A Comprehensive Guide to Aerogel Insulation for Your Building
When it comes to building construction, the focus is not only on creating strong structures but also on protecting them from external elements. Insulation plays a key role in maintaining the integrity and energy efficiency of a building. One of the most innovative materials used for insulation today is aerogel, a material that is gaining popularity due to its impressive qualities.
Aerogel insulation is becoming increasingly common in modern construction projects because of its unique benefits. In this article, we’ll take a deep dive into aerogel insulation, its advantages and drawbacks, and provide a step-by-step guide on how to install it.
What is Aerogel Insulation?
Aerogel insulation is made from synthetic amorphous silica (SAS), a substance known for its ability to trap air within its porous structure. This creates a material that is incredibly lightweight and efficient at insulating. Aerogel is often referred to as “frozen smoke” due to its translucent appearance and extremely low density, which ranges from 0.0011 to 0.5 g/cm³. In comparison, regular insulation materials have a much higher density.
This unique structure allows aerogel to provide excellent thermal insulation, reducing heat transfer and making it an ideal choice for both hot and cold climates. Additionally, it is resistant to fire, water, and chemicals, making it a durable and long-lasting option for building insulation.
Why Aerogel is a Great Insulator
Aerogel insulation offers several advantages for building applications. Here are some of the key benefits of using this material:
- Effective Heat Insulation: Aerogel is highly efficient at keeping out heat, making it perfect for regulating temperatures inside your building, whether it’s hot or cold outside.
- Lightweight and Flexible: Its lightweight nature means it doesn’t add much weight to the building structure, and its flexibility allows it to be installed in areas that are difficult to reach with traditional insulation materials.
- Water-Resistant: Aerogel is hydrophobic, meaning it doesn’t absorb water. This makes it resistant to moisture damage, which can help protect the building over time.
- Durable: Despite being light and flexible, aerogel is strong and long-lasting, providing a reliable insulation solution.
Drawbacks of Aerogel Insulation
While aerogel insulation offers numerous benefits, there are also some challenges that come with using it. These include:
- Cost: Aerogel is significantly more expensive than other types of insulation, such as fiberglass or foam. The manufacturing process is complex, and the raw materials used to make aerogel are expensive, which drives up the overall cost.
- Fragility: Aerogel’s lightweight nature also makes it fragile. It can easily crack or break under pressure or if not handled properly during installation, adding additional costs for protection and careful handling.
- Difficult to Obtain: The manufacturing process for aerogel is specialized and requires expensive supercritical drying techniques, which are not widely available. This makes the material harder to source and adds to the lead time required for installation.
How to Install Aerogel Insulation
Installing aerogel insulation requires a careful approach to ensure that it is applied effectively. Here is a simplified step-by-step guide to help with the installation process:
- Prepare Materials and Safety Measures: Before starting, make sure you have all the necessary materials and tools. Safety gear such as gloves, goggles, and protective clothing should be worn to avoid injury during installation.
- Clean the Surface: The area where the aerogel will be installed must be clean and free from dirt, debris, or moisture. A clean surface ensures that the insulation adheres properly.
- Choose the Right Type of Insulation: Depending on the area you are insulating (walls, floors, ceilings), choose the appropriate thickness and form of aerogel insulation.
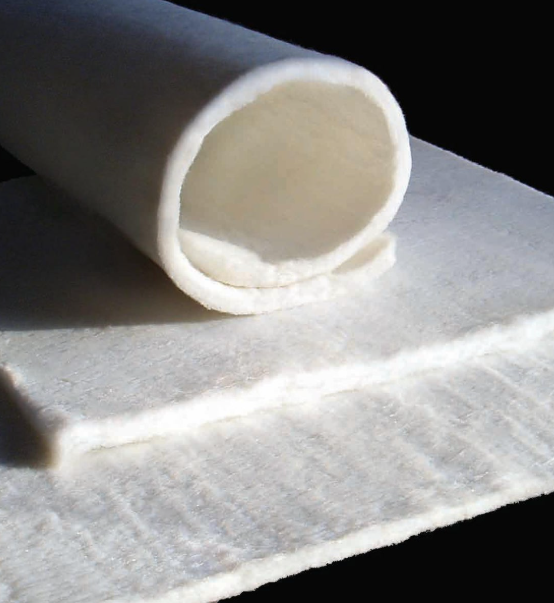
- Cut and Shape the Insulation: Aerogel insulation comes in different forms, such as sheets or blankets. Cut and shape the material according to the measurements of the space you are working on.
- Seal and Cover the Insulation: After placing the aerogel in position, seal it using an appropriate adhesive or cover it with protective layers to keep it secure and in place.
- Testing and Monitoring: Once the insulation is installed, perform tests to ensure it is functioning properly. Regular monitoring is important to check for any damage or degradation over time.
Final Thoughts
Aerogel insulation offers significant advantages for building construction, particularly in terms of its thermal insulation, lightweight nature, and resistance to fire and water. However, it does come with its challenges, such as high costs, fragile characteristics, and specialized manufacturing requirements. Before choosing aerogel as your primary insulation material, it’s important to weigh these factors carefully.
Despite its drawbacks, aerogel remains a highly effective and innovative solution for those looking for top-notch insulation. With proper installation and care, it can help keep your building comfortable and energy-efficient for many years.